 Got some ribbon scraps? Use them to make these simple ribbon dolls. To make your dolls, you’ll need:
- From Ten Two Studios, you’ll need a set of doll bodies. These samples were made using the Duchess Doll Bodies and the Duchess Wing Set.
- A printer, and good paper. I printed my sheets on 32lb. laser paper.
- Lightweight chipboard.
- A glue stick, and the liquid glue of your choice.
- Printed paper to use as a backing, if you wish.
- Scraps of ribbon, lace, fibers, or torn fabric. My longest pieces were about a foot long.
 Print out the sheets you’d like to use on good paper.
 Roughly cut out the pieces you’d like to use for each fairy. Don’t bother cutting details right now.
 Apply the pieces to chipboard using a glue stick.
 Roughly cut the pieces out again.
 Glue the pieces to a piece of paper if you’d like your finished fairies to have a pretty back.
 Cut the pieces out using sharp detail scissors.
 Choose your ribbons, and cut them in lengths no longer than a foot.
 Apply a little glue to the center back of the figure, and press ribbons into it. Add a little glue, and a few more ribbons, building up layers and fanning them out slightly.
 Turn the fairy over, and while the glue is still wet, shift the ribbons into place as you wish.
 Make a loop from a piece of ribbon, and glue it to the back of the figure.
 Apply glue to the center of the wings, and press into place, covering the ends of the ribbons and loop.
 Once again, flip the fairy over, and while the glue is still wet, shift ribbons and wings. Set the fairy aside to dry.
Decorate as you wish!
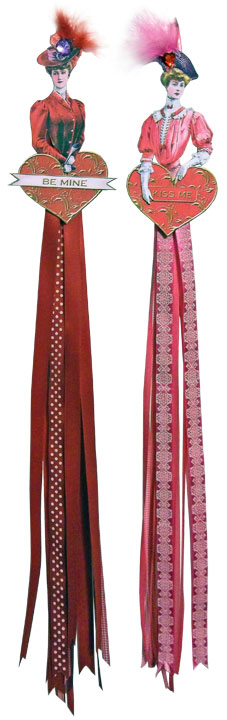
Here’s a set of ribbon dolls made using the Countess Doll Bodies:
I just love these. They are so interesting. Cant look away from them!
I love these ribbon angels, they are so cute.
Great idea. Thanks for sharing
I purchased the valentine and witches over a year ago. The witches were a hit at an girls Halloween party! This year we will be doing the Valentine ribbon ladies for our Valentine tea party
Thanks for your great ideas Lisa……
How do you display them? Or do you put a hanger on back?
As it says in the instructions, there’s a ribbon loop added to the back.